DNS Addon
WHMCS Addon for automatic DNS zone creation upon domain registration.
Introduction
This addon allows you to predefine DNS zone templates to be used when a new domain is being registered with DNS management. For example, you might want to direct that to a default website. Or, if the domain is assigned to a hosting product, use a specific zone for that product.
Features
- Manage DNS zones for your domains you have with our brands
- Currenctly supported registrar modules: ISPAPI and CentralNic Reseller
- Define a global zone, to be applied to all new domain registrations
- Define zones for specific hosting products, to be applied when registering a domain belonging to a hosting product
- Manually bulk apply any template to a select number of domains
- Supports A, AAAA, MX, MXE, CNAME, TXT and SRV records
- Supports WHMCS specific URL and FRAME record types for the website redirection feature
Requirements
In our system requirements, we recommend avoiding PHP versions that have reached their End of Life (EOL), as indicated in red on the PHP Supported Versions page.
To ensure compatibility with WHMCS, please follow these steps:
- Check the supported PHP versions for your desired WHMCS version using our WHMCS/PHP Matrix.
- Determine the required IonCube Loader version for your WHMCS version from the WHMCS/IonCube Loader Matrix.
- Identify the compatible MySQL version for your chosen WHMCS version using the WHMCS/MySQL Matrix.
Please note: We ensure compatibility with the latest WHMCS version and the maximum versions of the listed software dependencies. While our modules may still function with older PHP versions like PHP 7.4, we don’t provide support for them and cannot guarantee their continued compatibility. If you have questions or need assistance, please reach out to us.
Installation / Upgrade
Available for download here.
Extract files
Extract the zip contents to the root folder of your installed WHMCS instance.
Addon activation
-
For users with WHMCS version 8.0+, Open the WHMCS Admin Area navigate to
System Settings>Addon Modules -
For users with WHMCS version 7.3+, In the WHMCS Admin area, go to
Setup>Addon Modules - Find
CNIC DNSand click onActivate - Click on
Configureand make sure to configure Access Control as needed
Upgrading
When upgrading: Please make sure to back-up your existing CNIC bundle to prevent any data losses.
- Backup folders to a safe path
modules/registrars/ispapimodules/registrars/cnicmodules/addons/cnicdnsmodules/addons/cnicdomainimportmodules/addons/cnicmigrationmodules/addons/cnicssl_addonmodules/addons/cnicdomainsearchmodules/servers/cnicsslmodules/widgets/ispapi*.php // just delete these ones if presentmodules/widgets/hexonet_summary.php // just delete this one if presentmodules/addons/ispapidomaincheck (old domain search)resources/cnic
And then delete these folders from your WHMCS instance.
- Extract the zip archive into the root folder of your WHMCS instance. (Upgrade completed!
 )
)
IMPORTANT Ensure to read the Release Notes carefully before Upgrading! Our Release numbers follow semantic versioning and thus we follow the version syntax: MAJOR.MINOR.PATCH. Please ensure to backup your current version’s folder to have a fallback possibility you can use, just in case there’s something wrong with our new version.
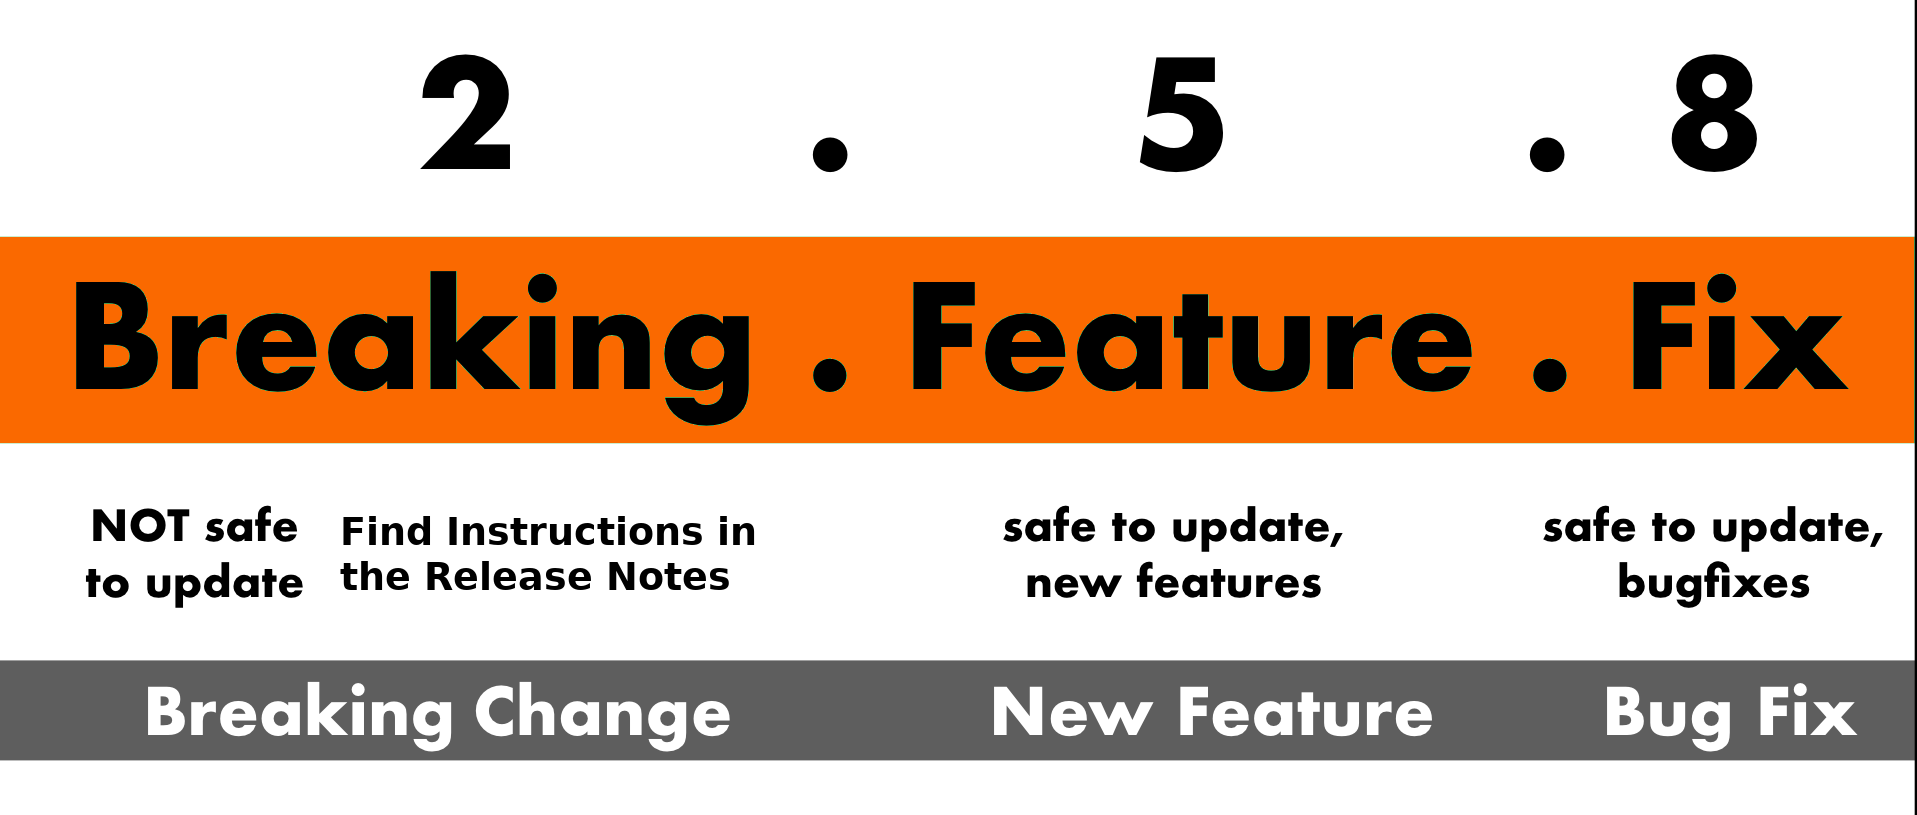
You can always upgrade without worries if the PATCH or MINOR version have just changed. If the MAJOR version has changed, check the release notes to avoid unexpected issues as a new MAJOR version comes always with breaking changes or at least with a new module behavior.
Follow the installations steps below and consider the provided release notes for the MAJOR version upgrade. In detail: if you’re upgrading from 1.x.y to 4.x.y, ensure to check ALL Major Version Release Notes up to the version you’re upgrading too. In this example, check the release notes for 2.0.0, 3.0.0 and 4.0.0.
If you’re upgrading regularly and keeping all our modules / addons / widgets updated, you run in less upgrade effort than doing multiple major version number steps. You can add/subscribe yourself to release notifications in our github repositories to get informed about new releases.
Usage
- Open the WHMCS Admin Area
- From the
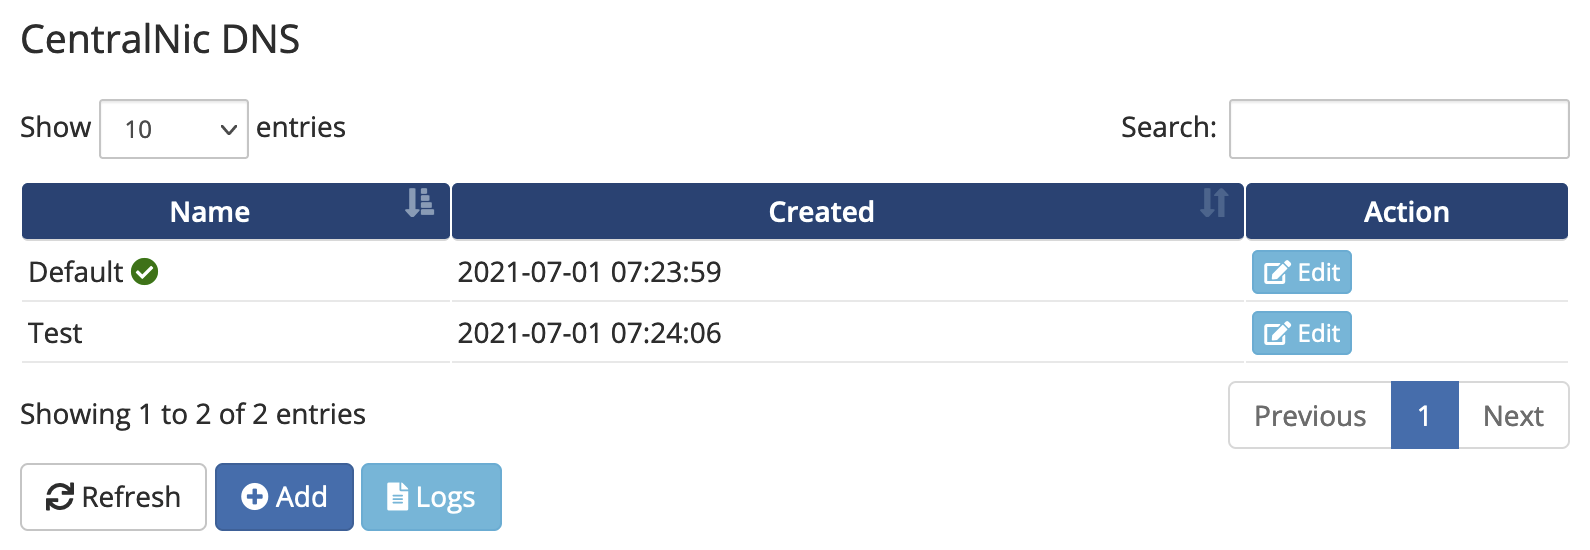
Addonsmenu, selectCNIC DNS - The list of configured zones will appear
Create a zone template
- Select the
Templatestab - Click on the
Addbutton - A modal will appear
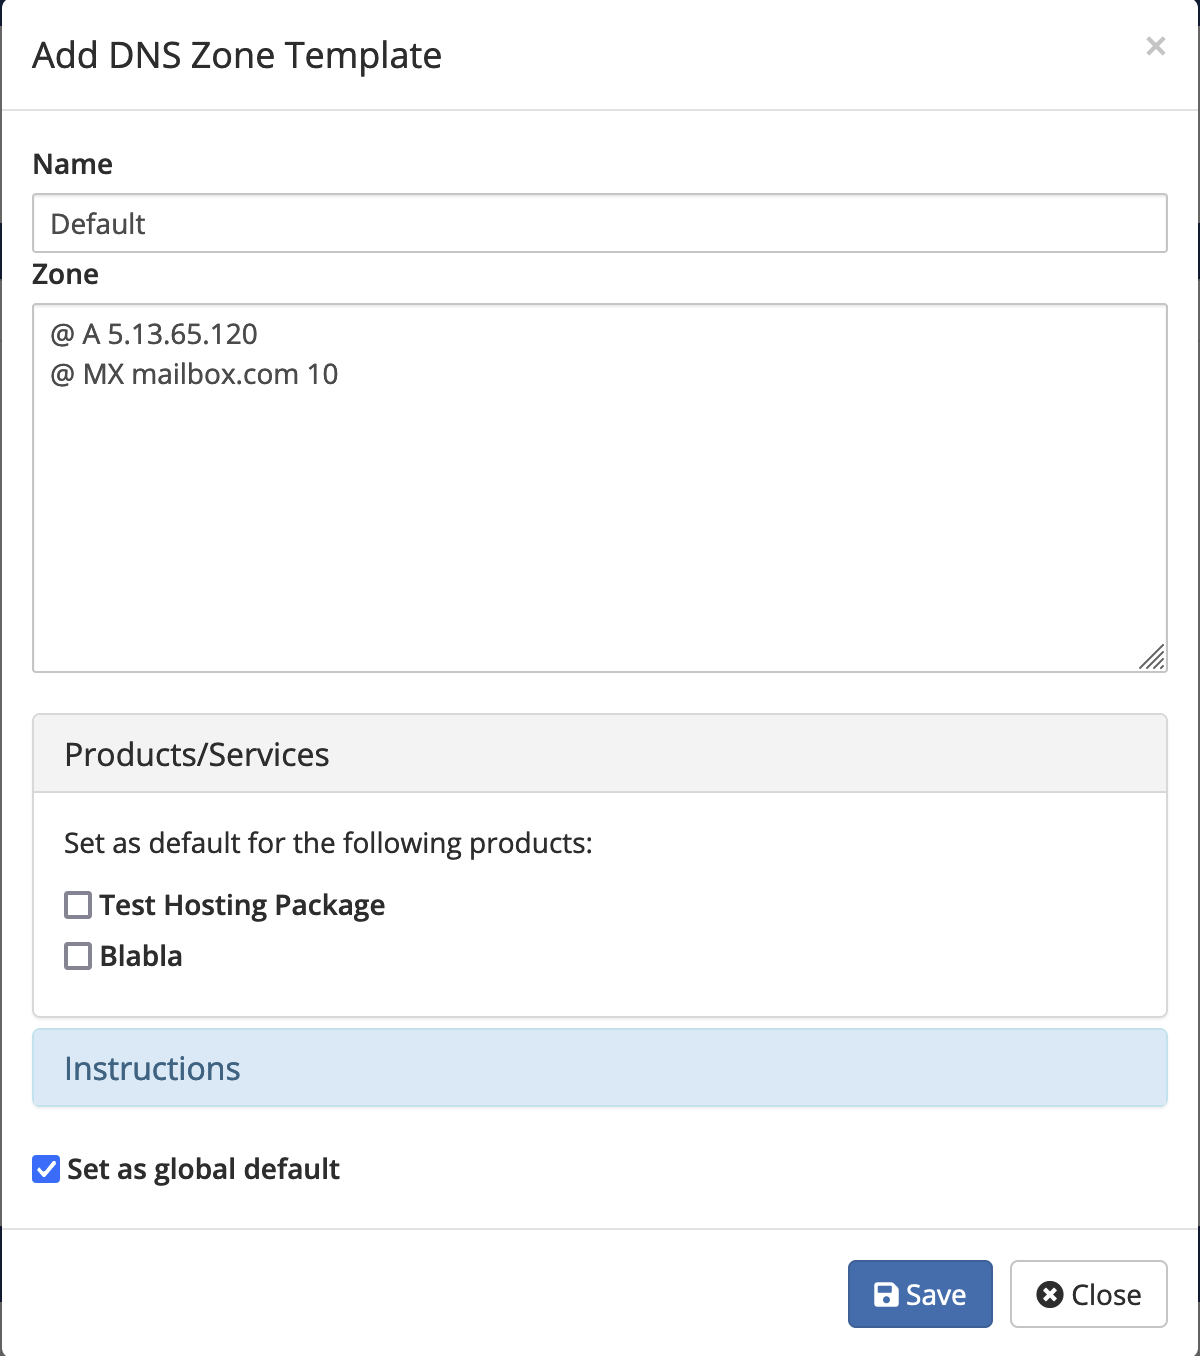
Fill out the form:
-
Name: this can be anything that helps you identify the template -
Zone: this should contain the template with a predefined syntax (see below) -
Products/Services: if you want the template to apply to specific hosting products, select them here -
Instructions: clicking here will show hints for the template syntax -
Set as global default: if enabled, the template will act as default for any domain.
Zone syntax
Write one record per line in this format:
<hostname> <type> <address> (<priority>)
- Type should one of the following: A, AAAA, MX, MXE, CNAME, TXT, SRV, URL, FRAME
- You can use ‘@’ for getting the domain name
- You can use ‘%ip%’ for assigning the IP based on the server
- Priority is only necessary for MX records
Example:
@ A %ip%
www CNAME @
mail A 127.0.0.1
@ MX mail.@ 10
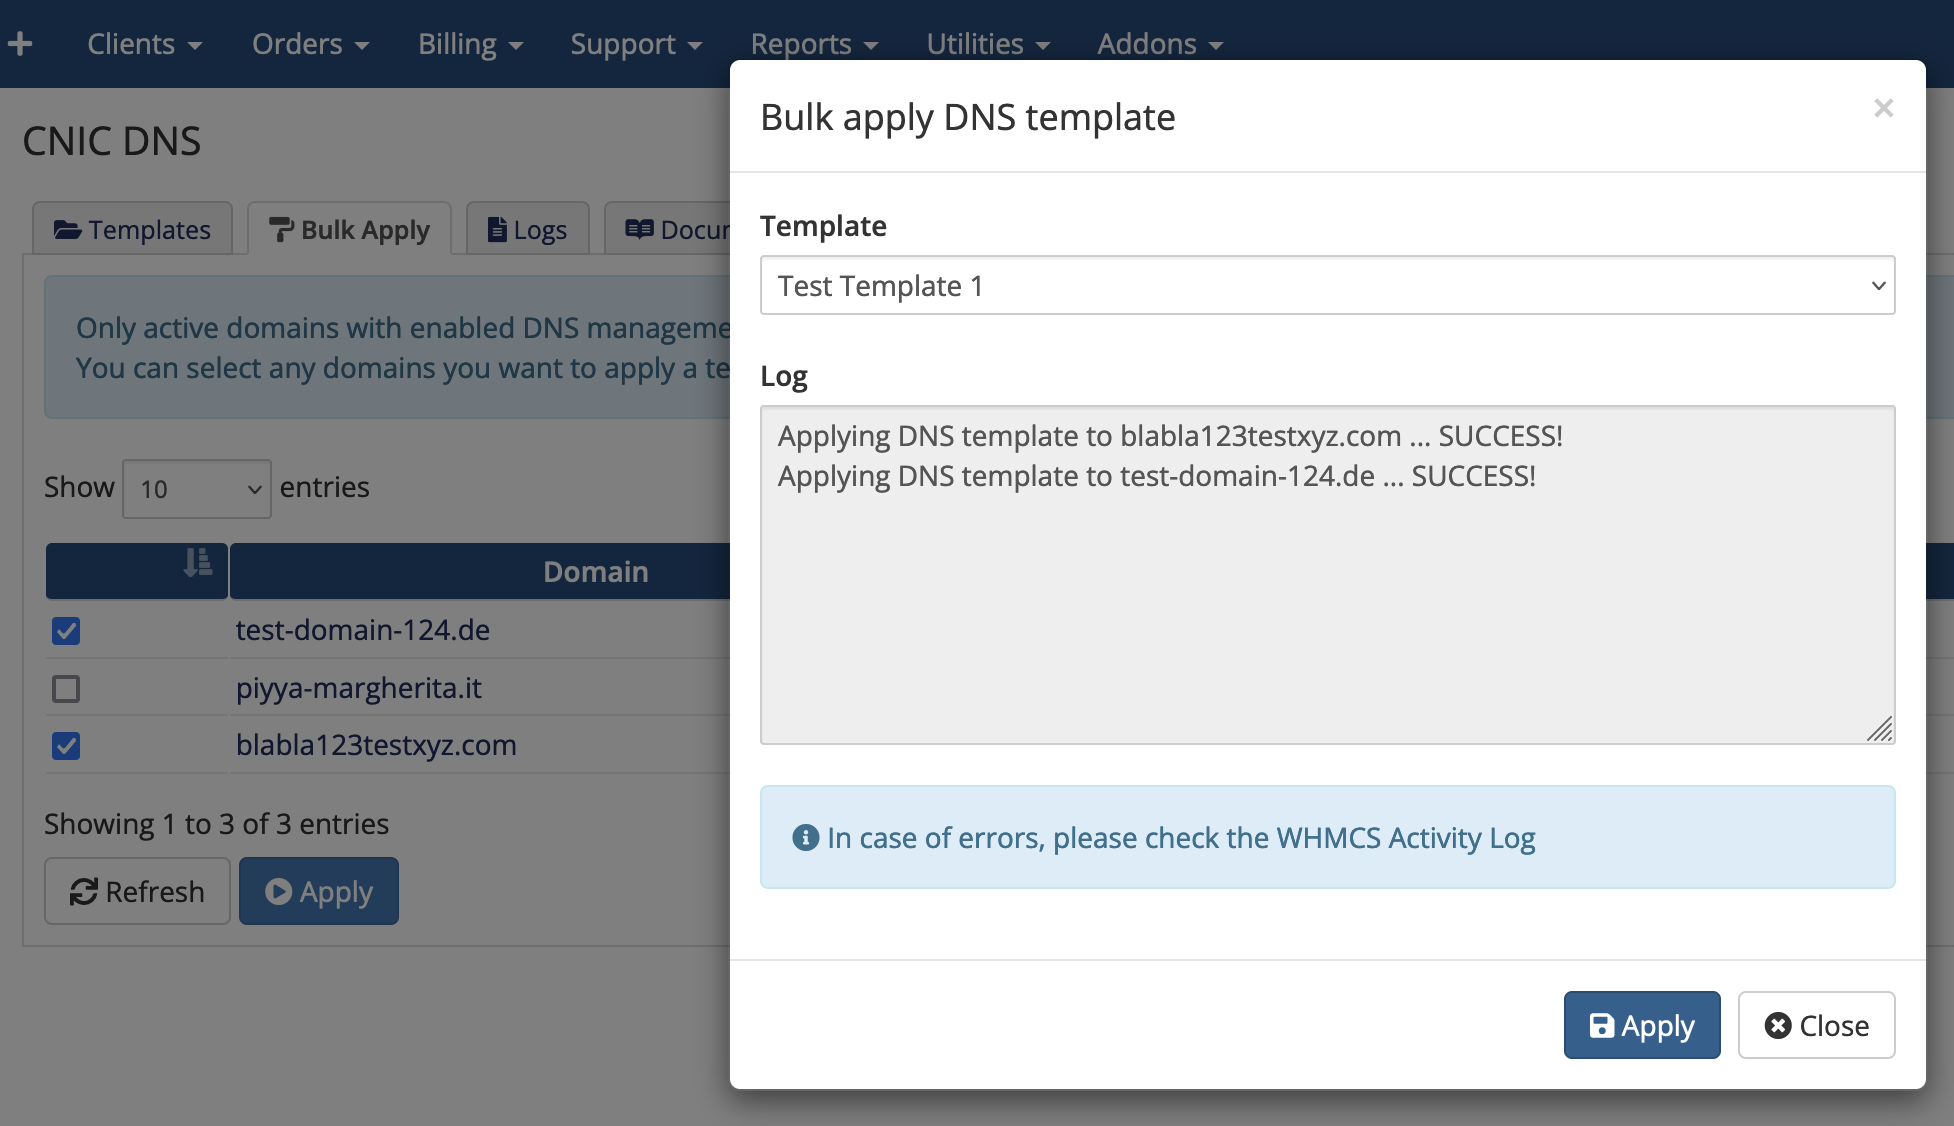
Bulk apply a template
- Select the
Bulk Applytab - A table will appear with all active domains that have DNS management enabled and are assigned to a supported registrar module
- Tick the checkboxes next to all domains you wish to apply a template to
- Click on the
Applybutton - A modal will appear in which you can select the template you wish to apply
- Click on
Applyin the modal - You can now track the progress for each domain in the modal box
- Should any error occur, you may consult the WHMCS Activity Log by selecting the
Logstab
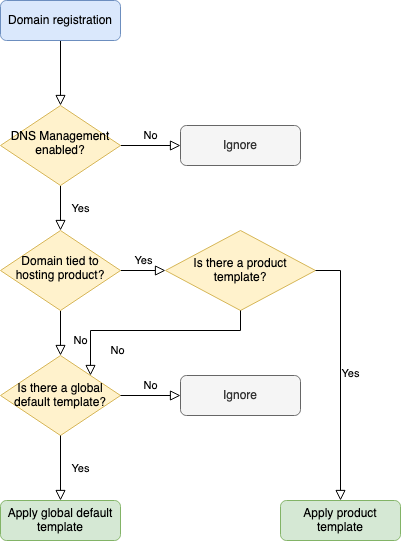
Behavior
The decision making process that establishes if and which zone template will be automatically applied to a domain, follows this flow chart: